ShapeScript
Text
The text command can be used to generate individual words, lines, or whole paragraphs of text. You use the text command as follows:
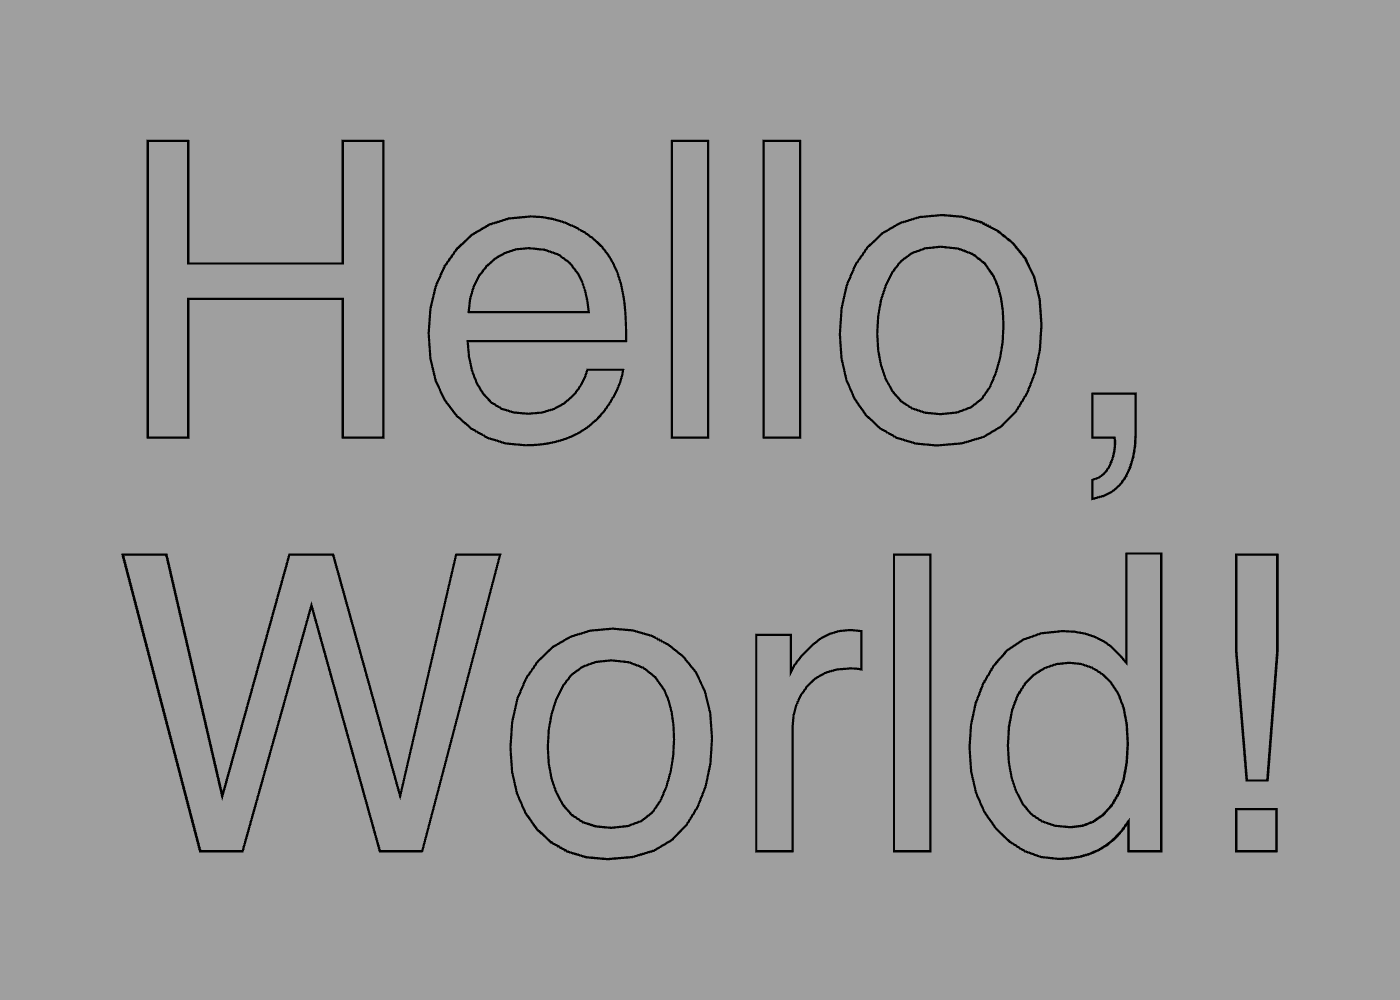
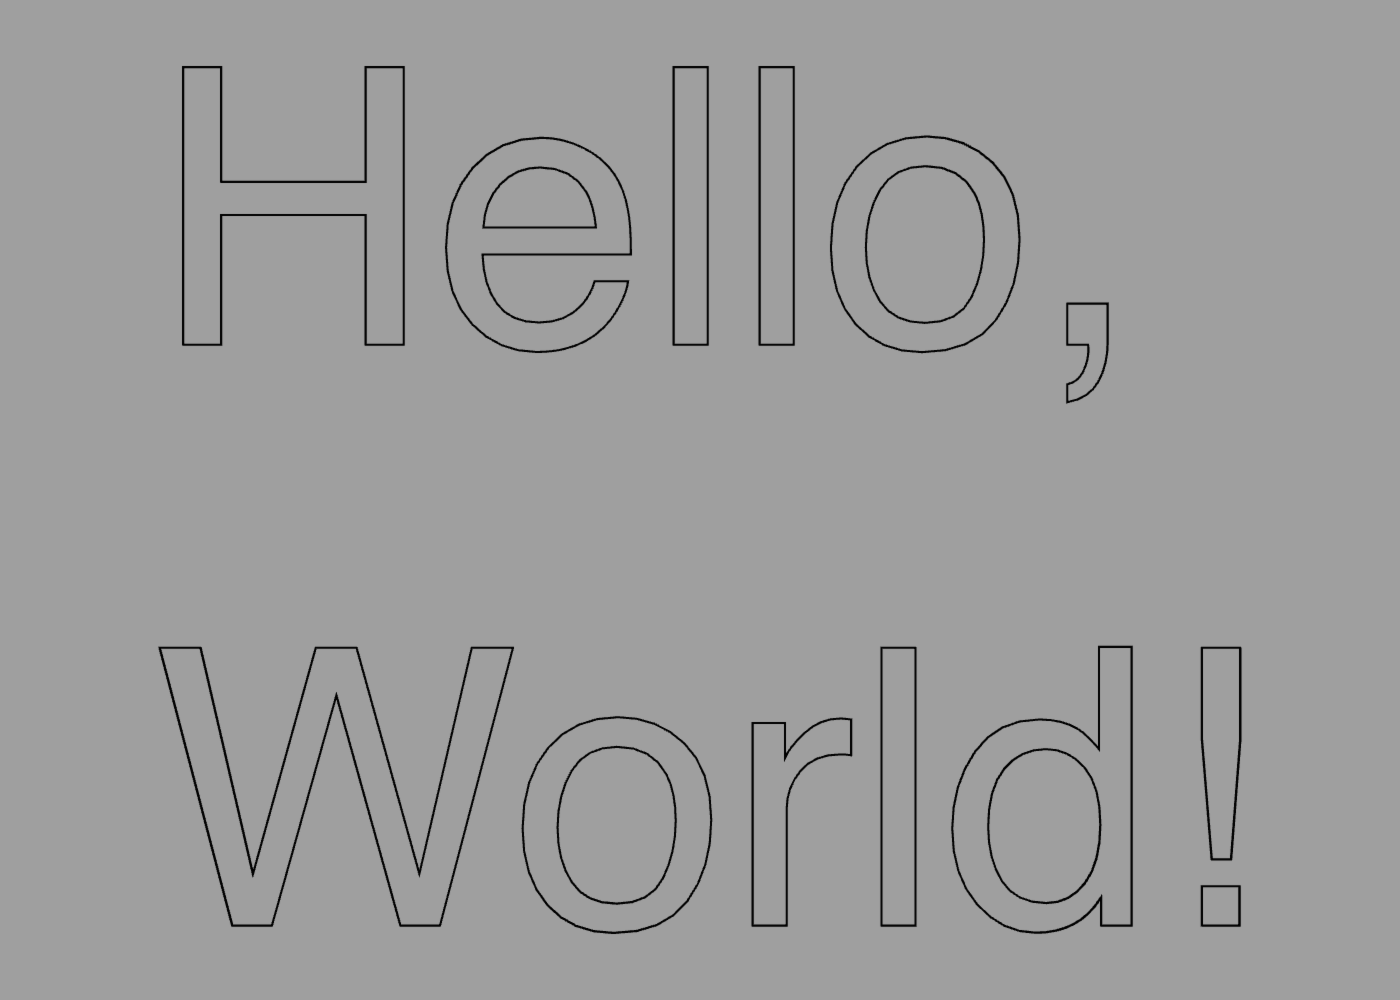
text "Hello, World!"
To create multiline text you can use the \n line-break sequence:
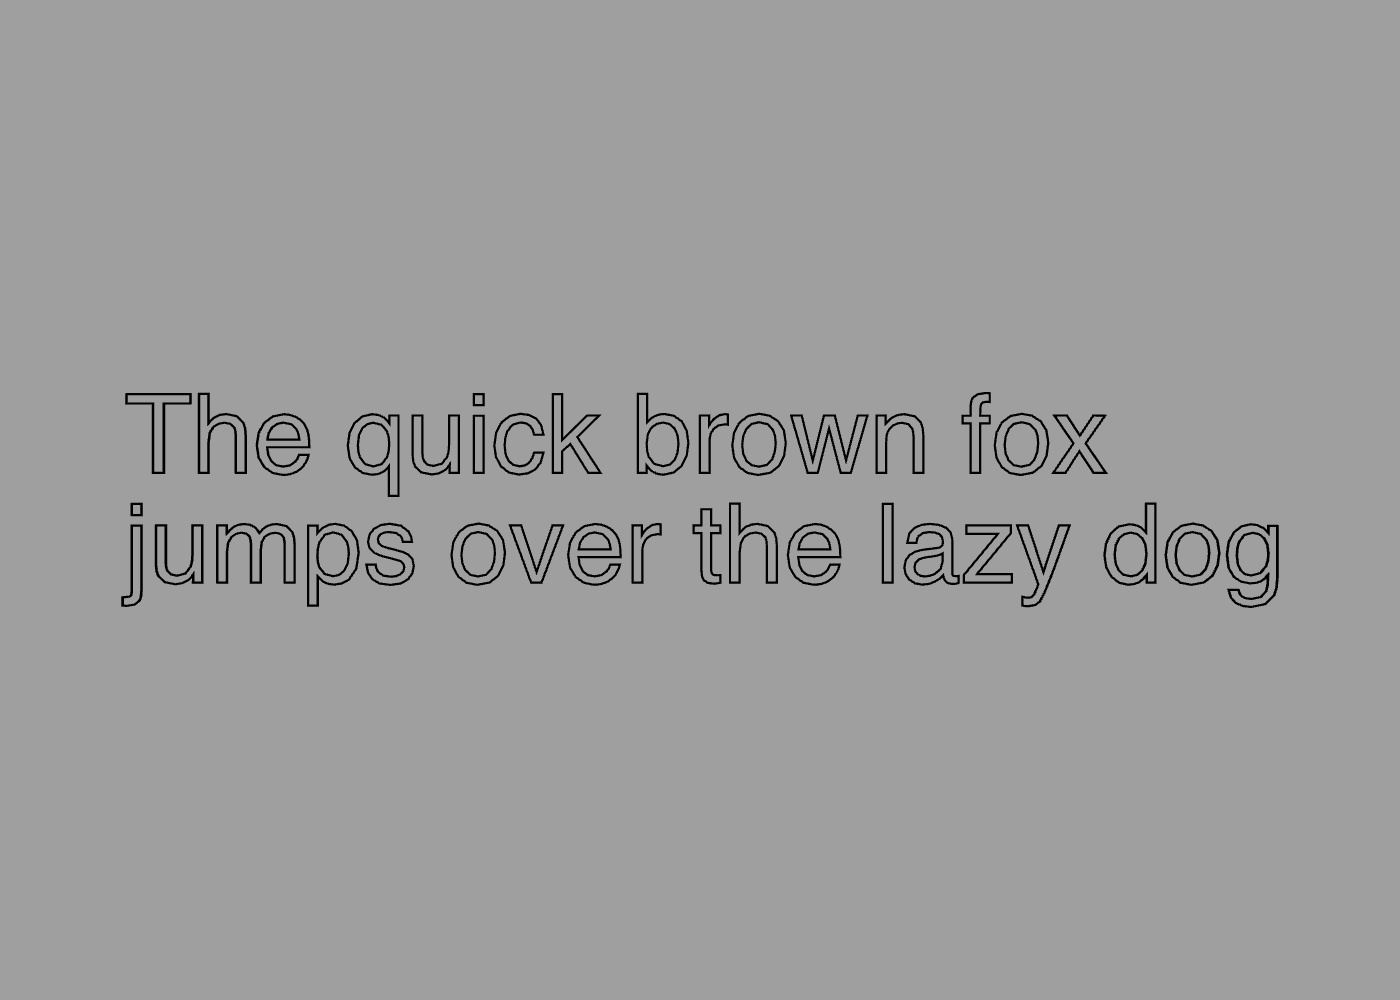
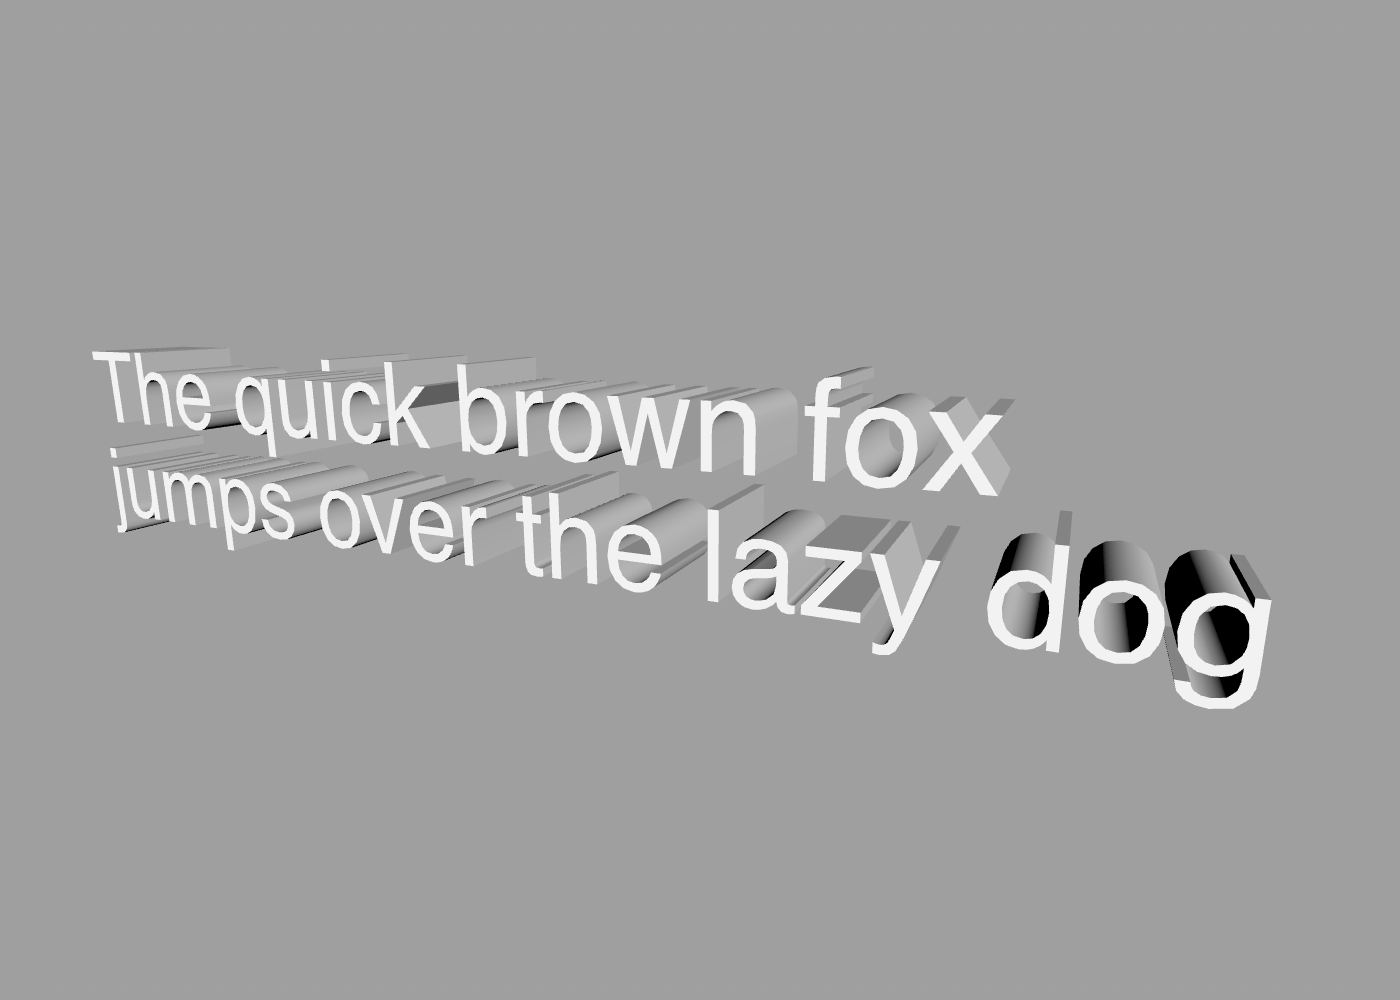
text "The quick brown fox\njumps over the lazy dog"
Or place each line of text on its own line within the file, surrounded by quotes:
text {
    "The quick brown fox"
    "jumps over the lazy dog"
}
The output of the text command is a series of paths, one for each character or glyph in the text:
You can use the fill or extrude commands to turn these paths into a solid mesh (see builders for details):
Interpolation
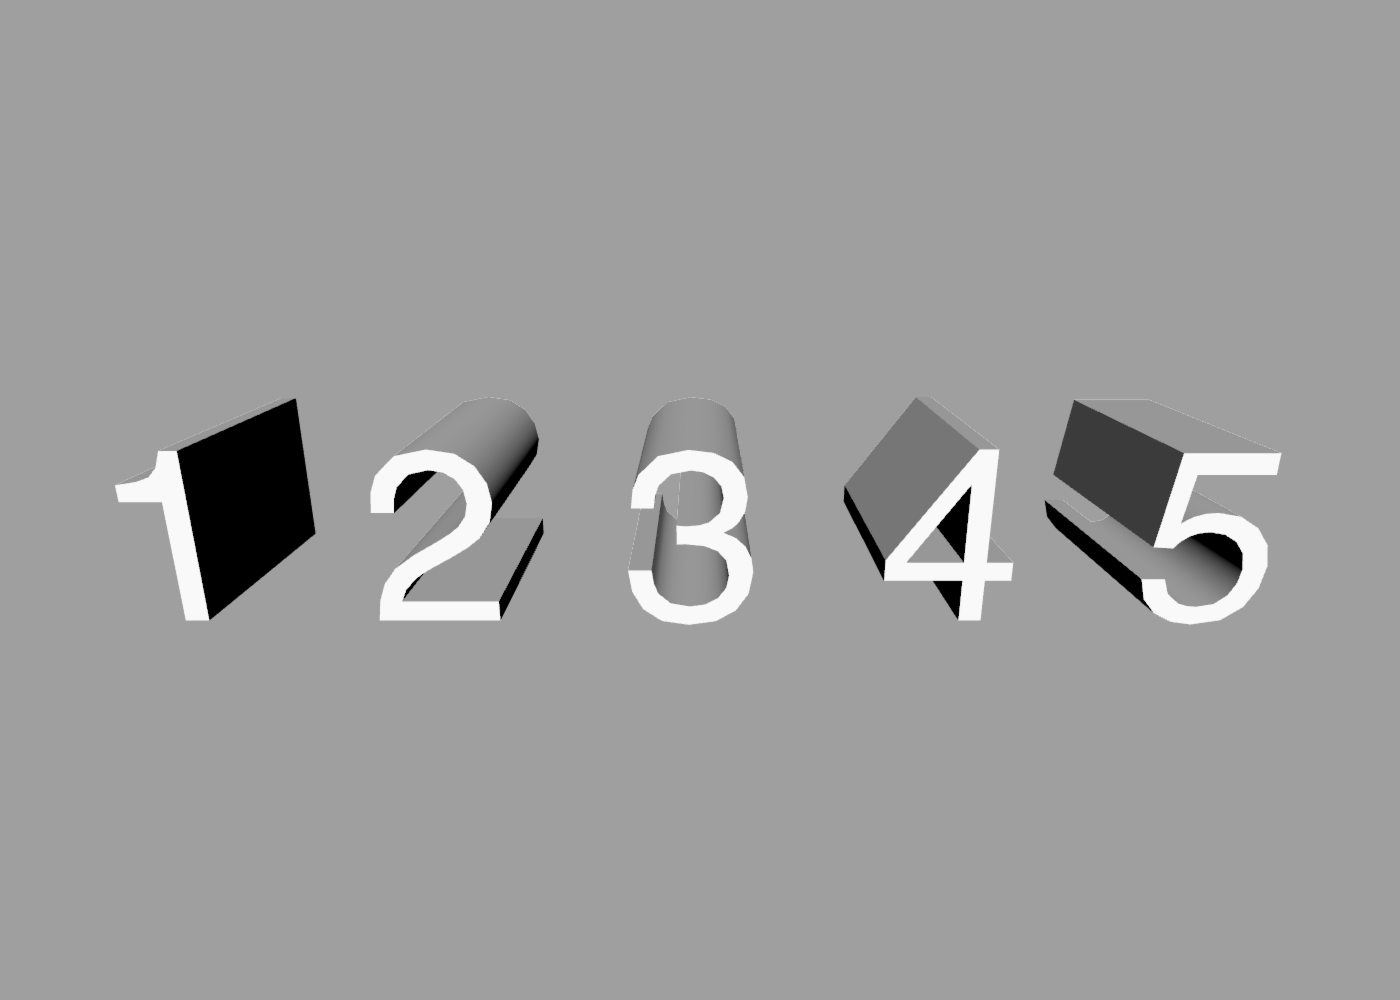
For your convenience, the text command will automatically convert numeric values to their character representation. The following displays the numbers 1 to 5 as 3D text:
for i in 1 to 5 {
    extrude text i
    translate 1
}
You may find that in some cases you need to compose some text dynamically from several source values. ShapeScript has a feature called string interpolation, whereby values can be inserted into a larger body of text.
To use string interpolation, simply pass multiple values to the text command and they will be concatenated together:
define apples 5
define pears 3
text "Bob has " apples " apples, and " pears " pears"
Text values are concatenated without spaces, so if you require spaces you should include them explicitly inside quotes:
text "Good" "bye" // becomes "Goodbye"
text "Hello " "World" "!" // becomes "Hello World!"
For your convenience, non-text values will be spaced-out automatically. If you wish to remove the spaces, you can place an empty string literal between them:
text 1 2 3 // becomes "1 2 3"
text 1 "" 2 "" 3 // becomes "123"
Note: Spaces between values make no difference to the output, so feel free to space them as you wish. These are all equivalent:
text "We're number "1"!"
text "We're number " 1"!"
text "We're number " 1 "!"
text "We're number "           1            "!"
Wrap Width
By default, text is laid out on a single line unless you explicitly add line-breaks, either by splitting the text into multiple literals or by adding \n escape sequences.
But by using the wrapwidth option, you can force text to wrap automatically to fit a specified width. This is useful when working with programatically generated text, where it may be cumbersome to have to add logic to insert linebreaks at the right point.
text {
    wrapwidth 3
    "Hello, World!"
}
Note: wrapwidth is specified in world units, not characters.
Size and Line Height
By default, text has a line height of one world unit. The line height is not the height of the actual characters, but the distance between two consecutive lines of text. If you imagine some lined writing paper, the line height would be the distance between the lines.
To adjust the text size, you can use the size option:
text {
    size 2 // increase text size by 200%
    "Hello, World!"
}
The size in this case actually refers to the line height, so setting a size of 2 increases the line height to 2 (and increases the actual size and spacing of the characters in proportion to this height).
You can resize the text non-uniformly by passing separate width and height values for the size:
text {
    size 2 1.5 // set width to 200% and height to 150%
    "Hello, World!"
}
Alternatively, for extruded text, you can set the size in the shape block instead, which allows you to also set the depth at the same time:
extrude {
    size 2 2 0.5 // 200% sized text, with 50% depth
    text "Hello, World!"
}
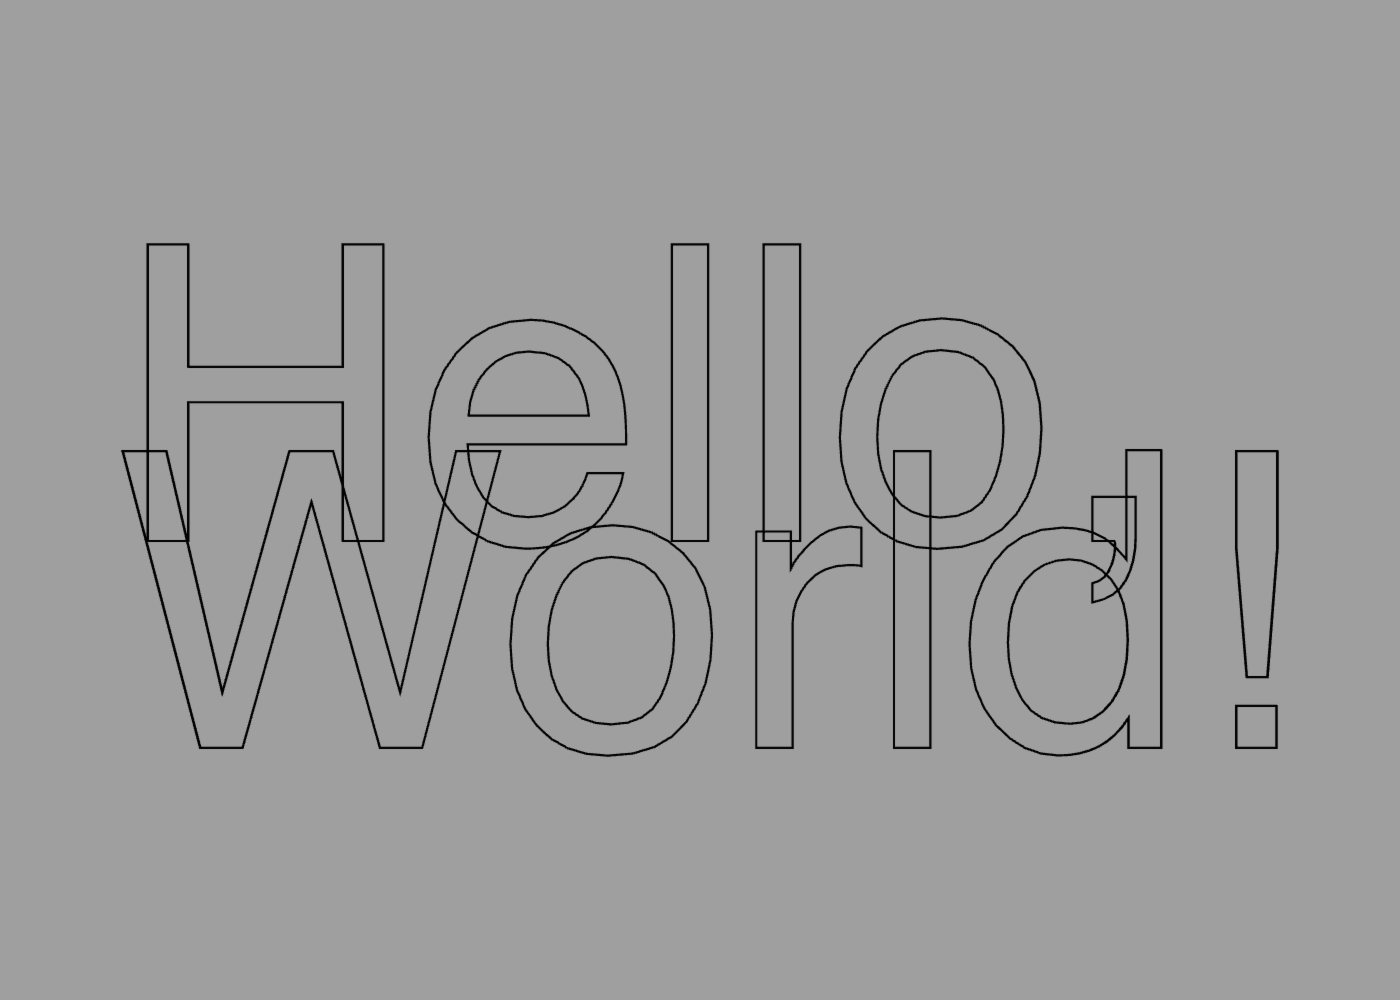
Line Spacing
By default, text has a line spacing of zero, meaning that consecutive lines of text with size 1 will be spaced exactly one unit apart, with no extra padding. You can increase or decrease this line spacing using the linespacing property. A value of 0.5 will add an additional space of 0.5 world units between consecutive lines:
text {
    linespacing 0.5
    "Hello,"
    "World!"
}
A value of -0.5 will reduce the spacing by 0.5 (causing the lines to overlap by 0.5 units):
text {
    linespacing -0.5
    "Hello,"
    "World!"
}
Position and Orientation
To adjust the text position and orientation, use the position and orientation commands:
text {
    position 2 1 // move text 2 units to the right and 1 unit up
    orientation 0.5 // rotate by 90 degrees
    "Hello World"
}
Or for filled or extruded text, you can set these on the containing shape block instead:
fill {
position 1 2 3 // set the position in 3D space
orientation 0 0.25 0 // rotate around the Y axis
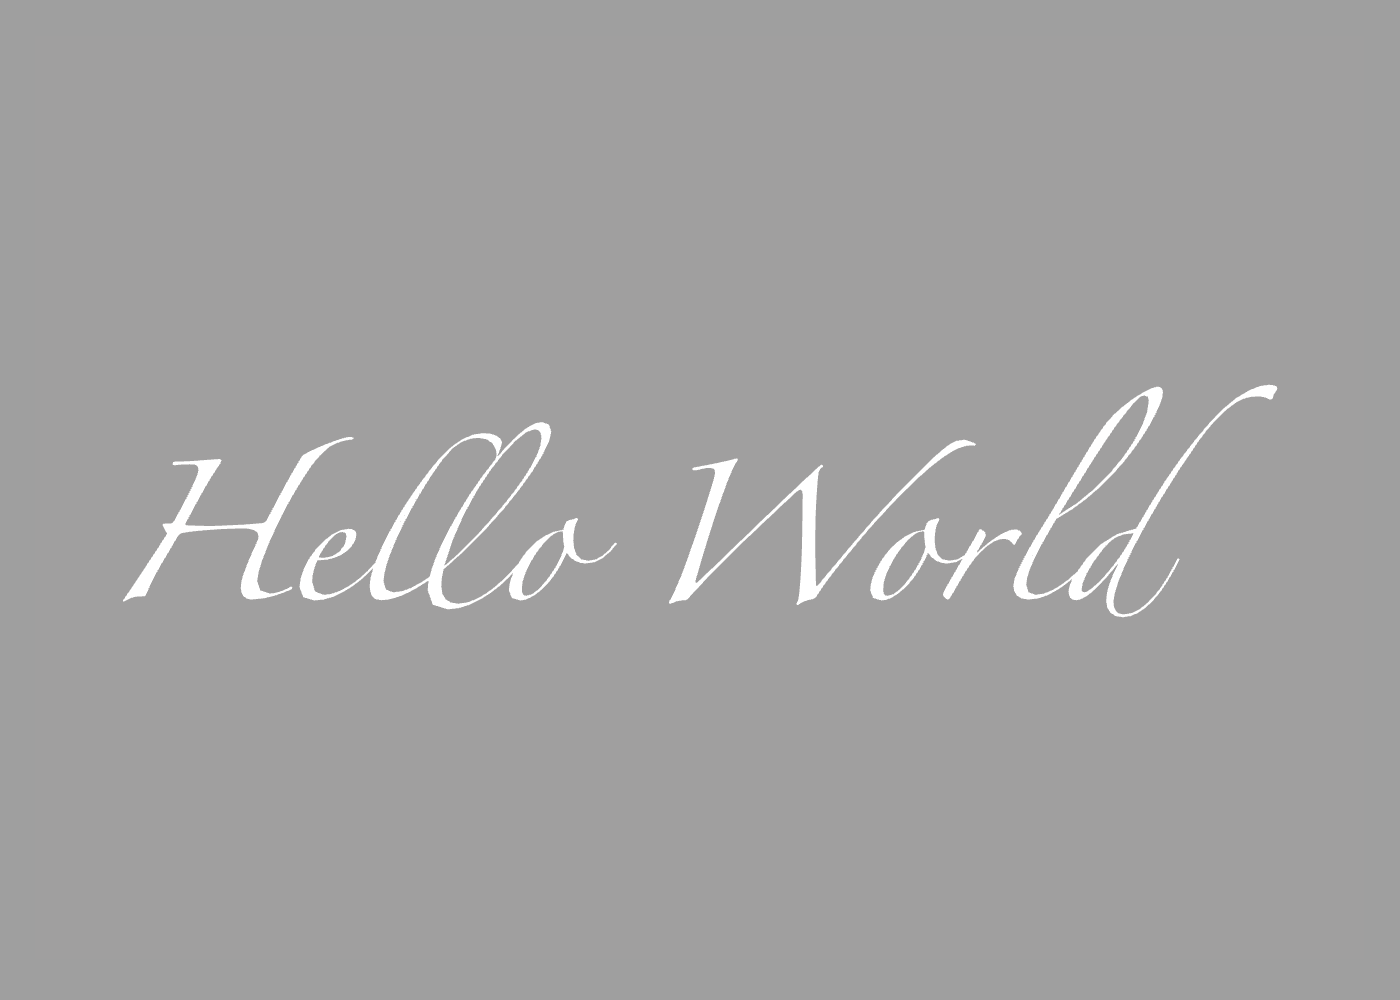
text "Hello World"
}
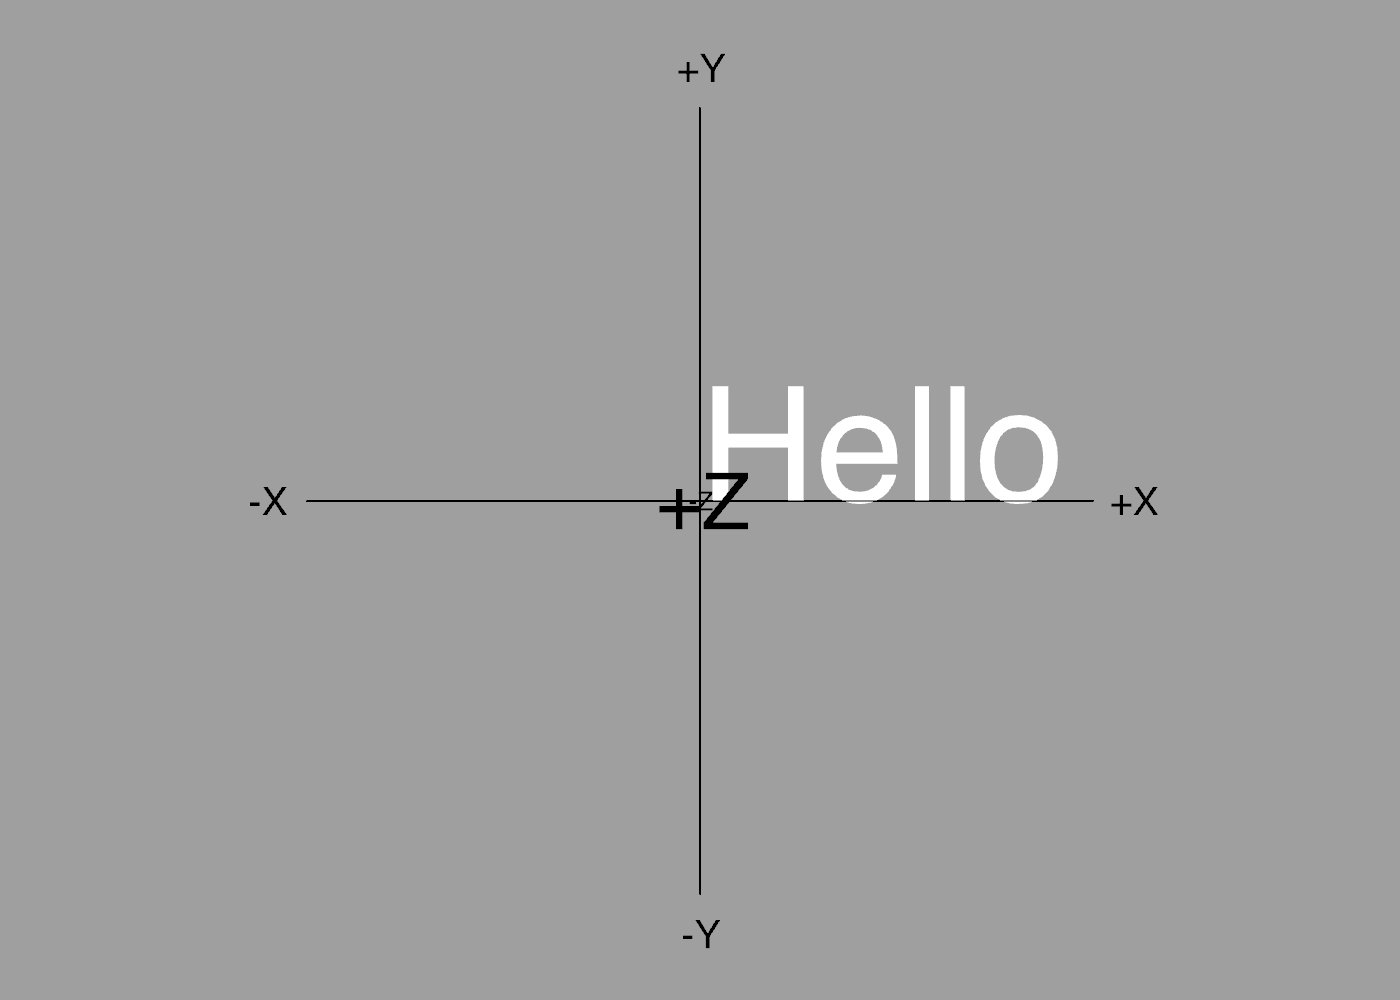
Unlike most shapes, which are positioned relative to their center, text is positioned relative to its left margin and baseline.
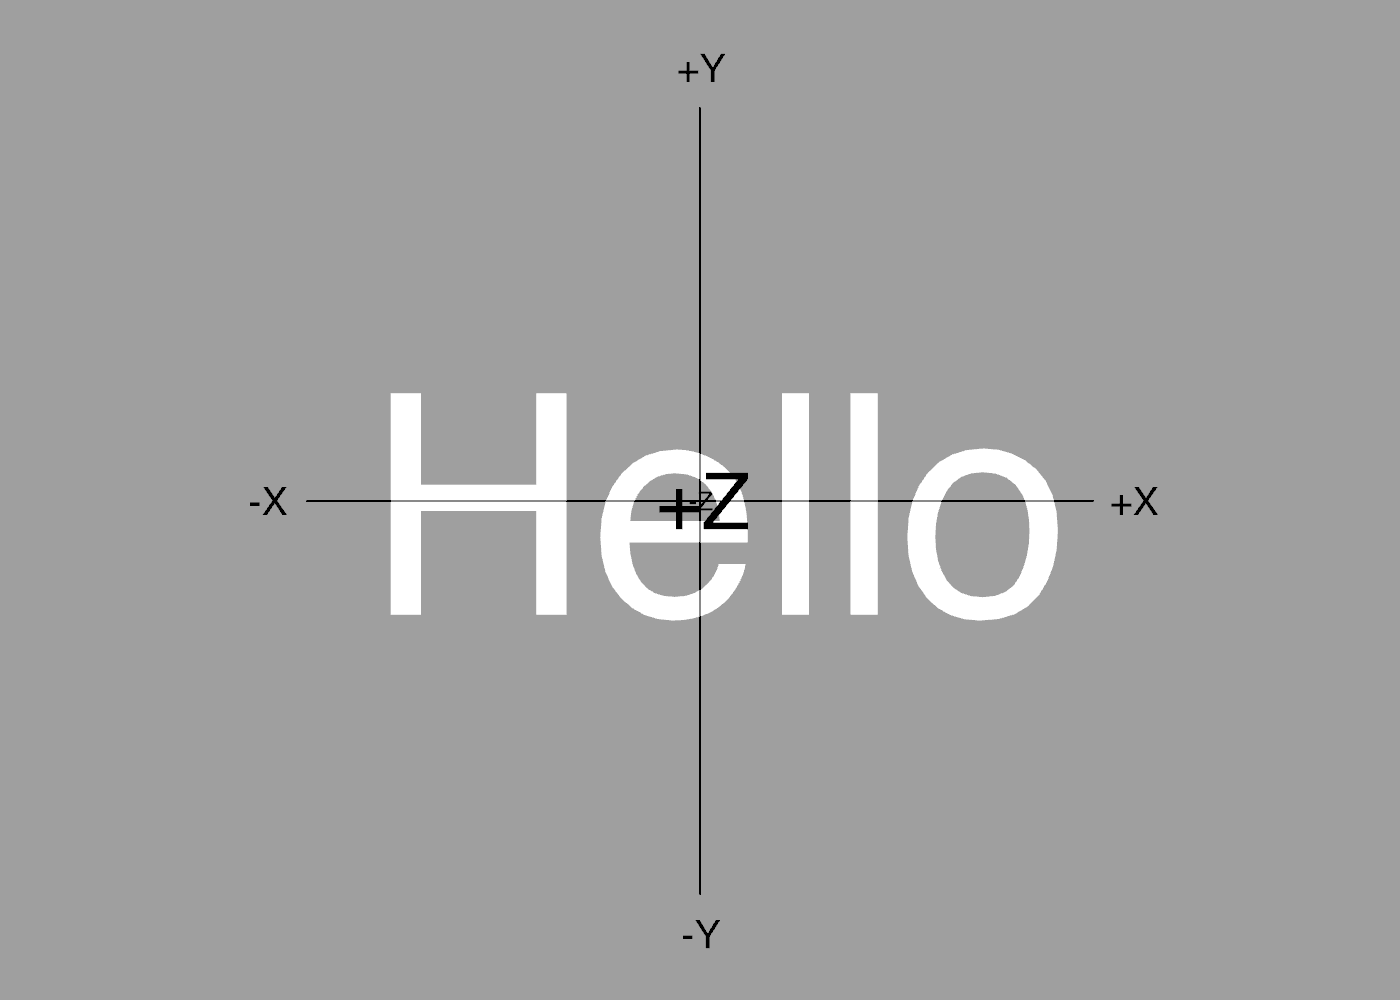
In order to center a piece of text, you will need to know its actual dimensions. For this you can use the bounds member property. The following code uses the bounds to center some text:
define hello text "Hello"
translate -hello.bounds.width/2 -hello.bounds.height/2
fill hello
Fonts
To adjust the text font, you can use the font command. like color and other material properties, font can be placed either inside the text block, or anywhere before it in the same scope:
font "Zapfino"
fill text "Hello World"
Note: Some fonts are inherently much more detailed than others, and the text may take extra time to generate. You may want to set the detail option to a lower value for text than you would for other geometry.
The font name you provide must match a font that is already installed on your system. If no matching fonts are found then an error will be raised. To get a list of available fonts you can use the fonts command.
This script uses the fonts command to print the names of all available fonts in the console:
for name in fonts {
    print font.name
}
And this script displays the first ten font names as 3D text, with each name rendered in the appropriate typeface:
detail 8
for name in fonts[0 to 9] {
    font name
    fill text font.name
    translate 0 -1
}

If you wish to load a font file directly, without installing it on your system, you can pass the filename or path to the font command instead of the font name:
font "filename.ttf"
Only fonts with a “.ttf”, “.otf” or “.ttc” file extension are supported. The extension is required, or the font parameter will be treated as a system font rather than a file. If a relative path or filename is used, it should be specified relative to the ShapeScript file that references it.
Note: You can also import a font file to get a reusable font value without changing the current font, and then pass that value to font when needed (see import).
Once loaded in this way, fonts will appear in the fonts list and can be referenced by name in subsequent calls. To get the name of a font that you have loaded from a file, you can print it:
font "filename.ttf"
print font.name // Prints the actual font name, e.g. "Arial"
The filename can be constructed dynamically by using the string interpolation feature, which is sometimes useful if, for example, you have multiple font files with a common prefix or suffix:
for n in 1 to 5 {
    texture "font" n ".ttf"
    text "Hello, World!"
    translate 0 -1 0
}