ShapeScript
Meshes
While they may appear solid, the 3D shapes that ShapeScript produces are actually hollow shells composed of polygons. These polygon shells are known as meshes.
ShapeScript provides many tools for constructing meshes, including primitives, builders and CSG operations, but you can also create meshes manually by specifying each polygon yourself. While this is generally a tedious approach compared to the other tools, it affords you complete control over the mesh topology, and allows you to create arbitrary shapes that might be hard to achieve with higher-level tools.
Polygons and Points
A mesh is made up of one or more polygons, and each polygon is made up of three or more vertices or points. To construct a mesh you use the mesh, polygon and point commands. The following code defines the simplest possible mesh - a single triangle:
mesh {
    polygon {
        point 0 0
        point 1 0
        point 1 1
    }
}
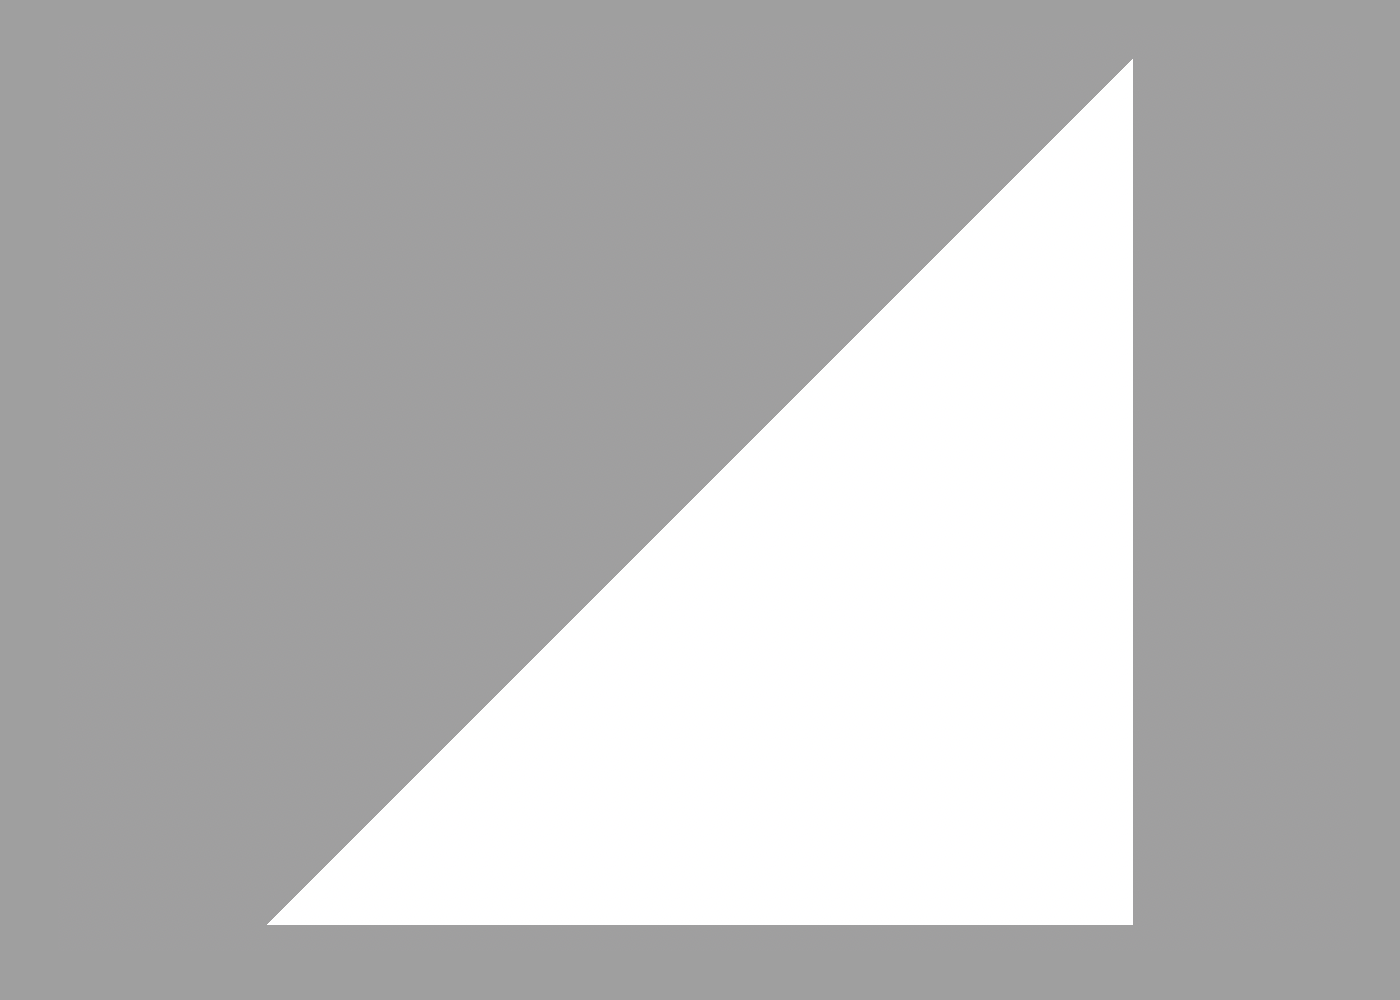
The point command creates a polygon point or vertex. You can specify the point using a tuple of up to three coordinates for the X, Y and Z position. In this case we’ve just specified two values, so the Z coordinate defaults to zero.
You can also create points using block syntax, or assign them to symbols and use them later:
define top point {
    position 0 1
    color red
}

mesh {
    polygon {
        point -1 -1
        point 1 -1
        top
    }
}
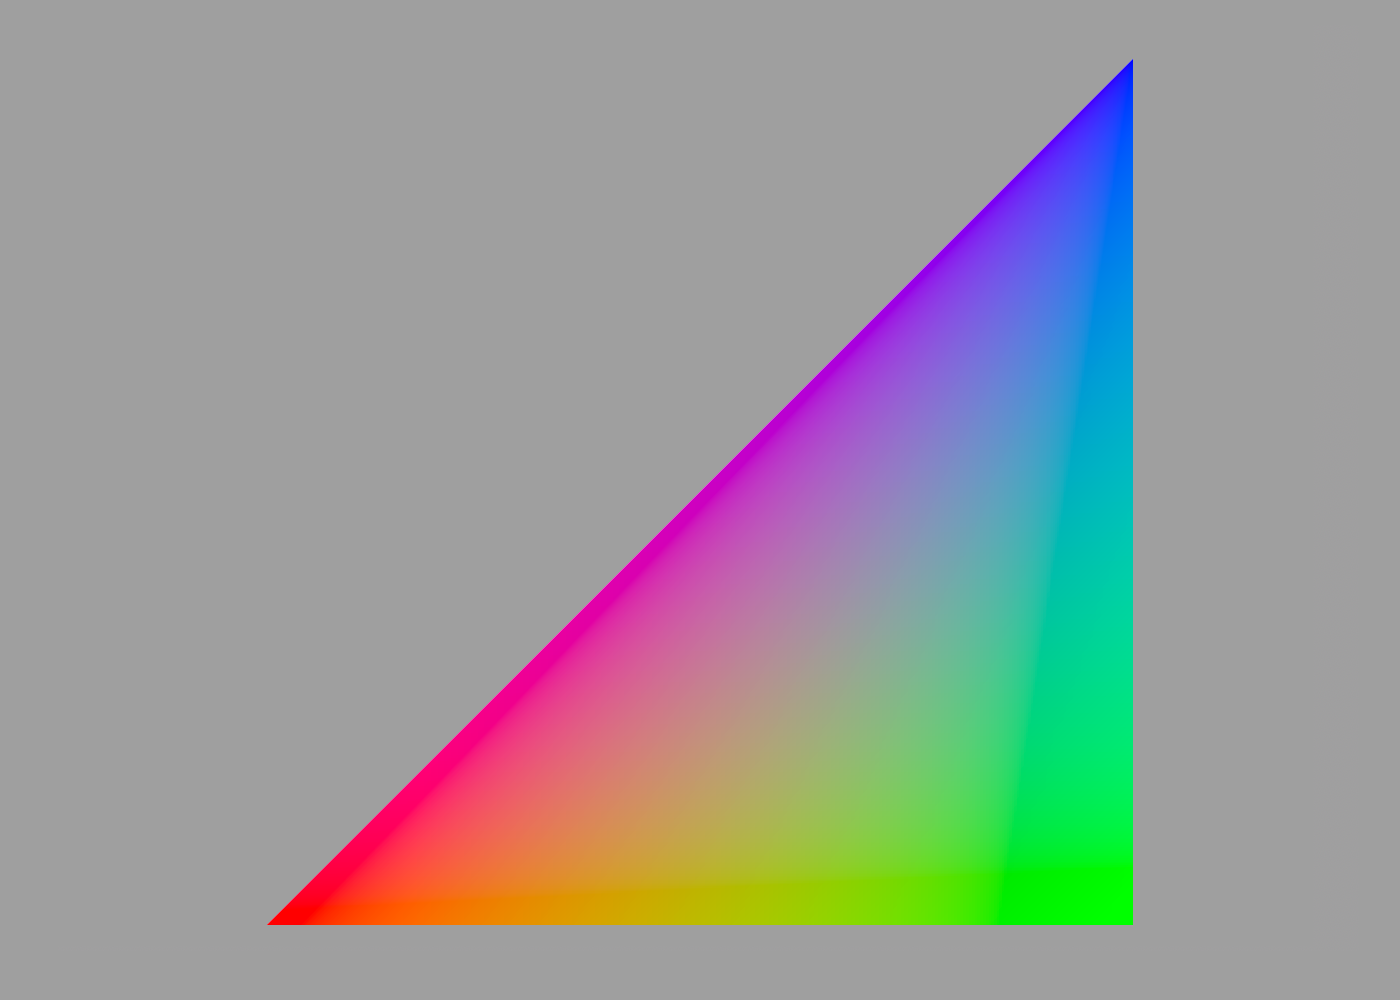
Manually constructed meshes do not currently support textures, but they inherit the current material color. Color can also be applied separately to individual vertices within a mesh. When vertices of a given polygon have different colors applied, the color will be smoothly interpolated between them, creating a gradient:
mesh {
    polygon {
        color red
        point 0 0
        color green
        point 1 0
        color blue
        point 1 1
    }
}
Watertightness
Most of the mesh-construction commands in ShapeScript produce shapes that are watertight, meaning that they do not contain any holes that would expose the inside of the polygon surface. Manually-created meshes may contain holes, but ShapeScript now preserves watertightness automatically when it builds the final geometry, so unlike in earlier versions you won’t normally need to add extra faces just to make a mesh usable with CSG operations.
The original mesh definition still matters for polygon orientation, colors, and normals, but you generally don’t need to duplicate faces by hand just to seal the shape.
That raises another question: how does ShapeScript decide which way a polygon is facing?
Winding order
By convention, polygons in ShapeScript are assumed to be defined with counterclockwise (aka anticlockwise) winding. What that means is that when looking at the polygon from the front, the vertices will be ordered in counterclockwise direction. If you want to explicitly model both sides of a surface, you can add a second polygon with the inverse vertex order:
mesh {
    // Front
    polygon {
        color red
        point 0 0
        color green
        point 1 0
        color blue
        point 1 1
    }
    // Back
    polygon {
        point 1 1
        point 1 0
        point 0 0
    }
}
(We’ve made the back face white in this case, so you can tell which side is which).
Procedural Meshes
We’ve learned how to make a triangle, but what about something a bit more complex? For our next trick we’re going to create a cube.
A cube has six faces, each consisting of four vertices - 24 vertices in total. But in fact there are really only eight unique vertices, so rather than tediously typing out the same points over and over, maybe we can use the power of scripting to save ourselves some effort?
First we’ll define a block called “side” that creates a single side of the cube:
define side {
    color rnd rnd rnd
    polygon {
        point -0.5 -0.5 0.5
        point +0.5 -0.5 0.5
        point +0.5 +0.5 0.5
        point -0.5 +0.5 0.5
    }
}
Note that the color rnd rnd rnd - this will produce a different random color each time the block is called, making the cube a little more interesting to look at.
Next we’ll call side block six times from inside a mesh, passing a different orientation each time:
mesh {
    side { orientation 0 }
    side { orientation 0 0.5 }
    side { orientation 0 1 }
    side { orientation 0 1.5 }
    side { orientation 0 0 0.5 }
    side { orientation 0 0 -0.5 }
}
And voila! A colored cube:
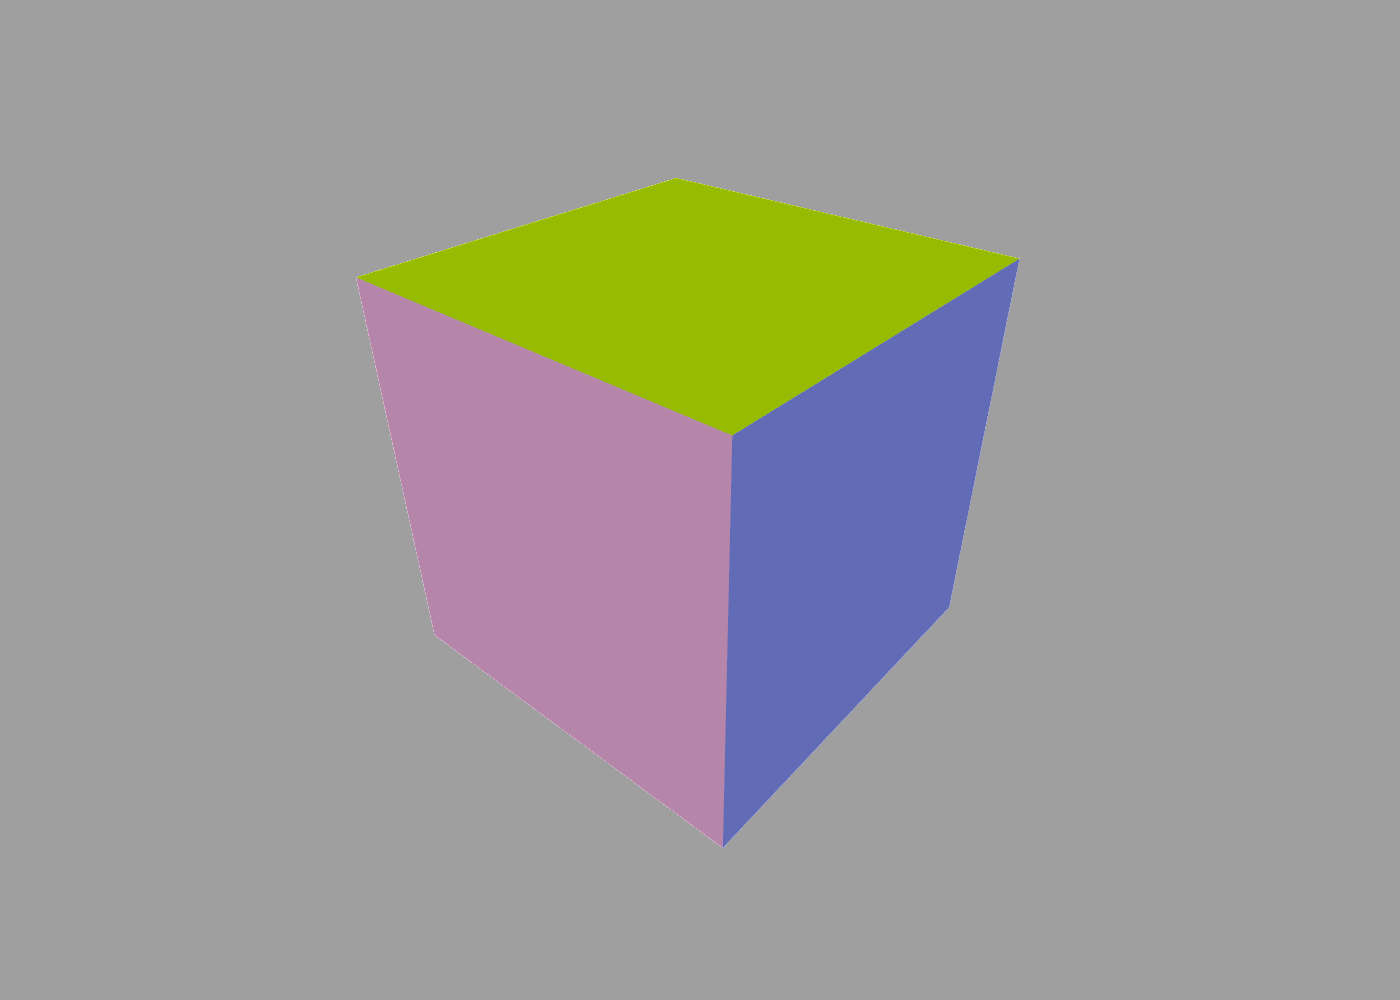
Obviously this is a lot more trouble than just using the cube command, but hopefully you can see the potential for creating more interesting shapes.
Concave and Non-planar Polygons
In many 3D engines, meshes must be constructed exclusively from triangles. The reason for this is that by definition a triangle is always both convex and planar, meaning that all its vertices lie on the same plane, which simplifies the mathematics needed to rasterize or render the mesh.
ShapeScript places no such restrictions on the polygons that you define in your mesh. Non-planar or non-convex polygons will be automatically split into their constituent triangles as needed for export or display.
Mesh Hierarchies
You can also use the mesh command to convert other shapes or shape hierarchies into a single mesh:
mesh {
    text "Hello"
    group {
        sphere
        translate 0 1
        cube
    }
}
This can be useful for precisely controlling the exported geometry.