ShapeScript
Lights
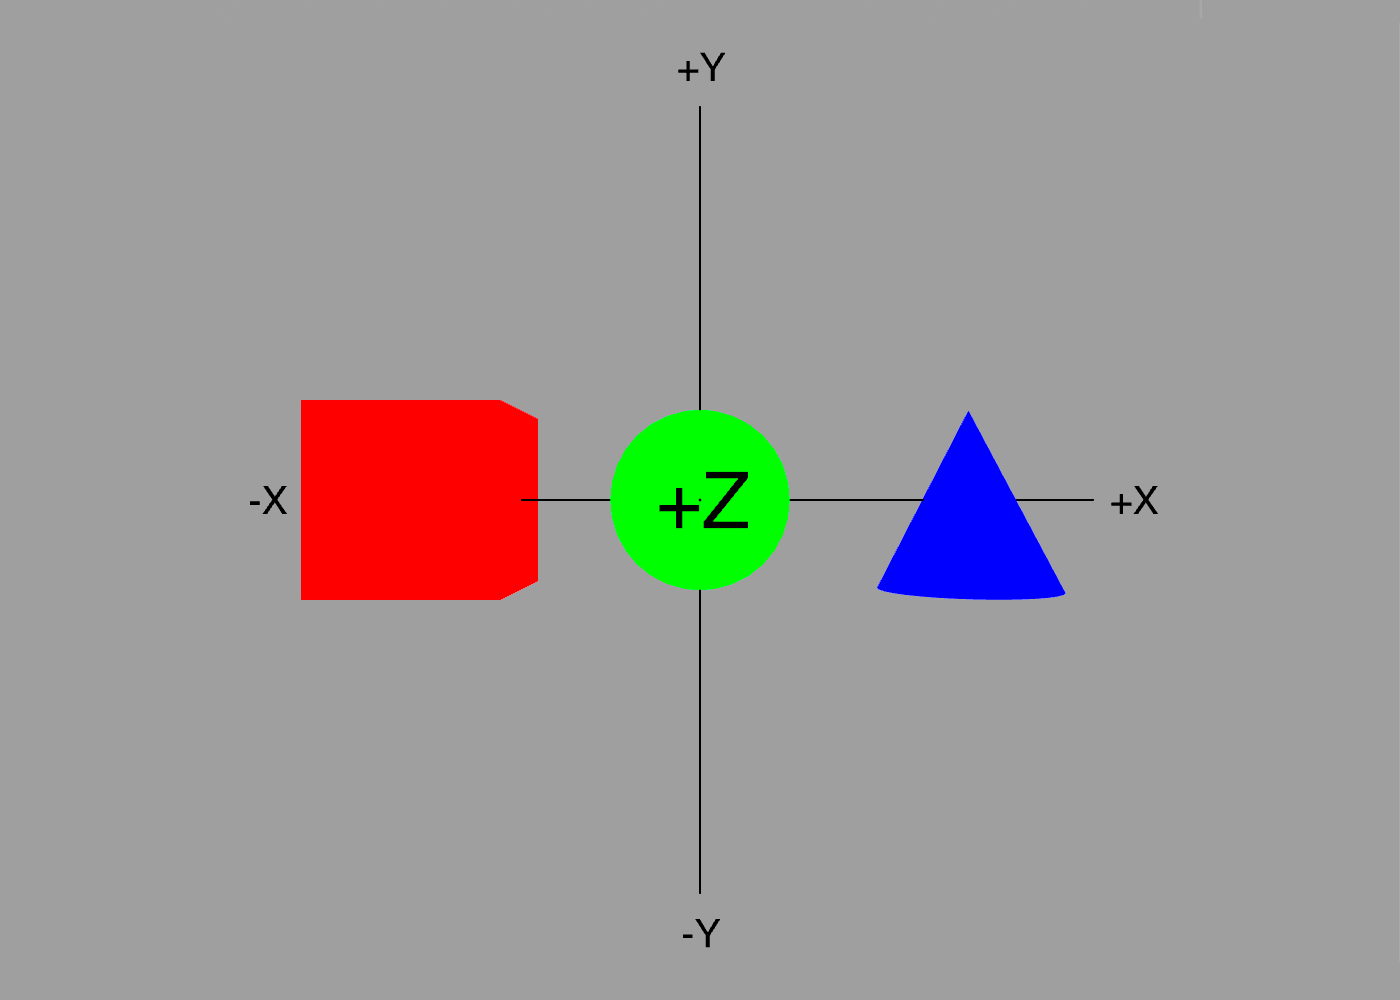
By default, scenes created in ShapeScript are lit with a bright, white, camera-aligned directional light. This is good for viewing purposes, but limited.
ShapeScript allows you to add your own lights to the scene, which can help produce a nicer effect when rendering a scene for display.
Lights come in four basic types, all created using the light command.
Note: there is a maximum of 8 non-ambient lights per scene. If you need more, consider pre-lighting your models using colors or textures.
Ambient
An ambient light is one that illuminates all objects in the scene uniformly. It does not have a position or direction, and does not cast shadows.
To define an ambient light, add the following to your scene:
light {}
This creates a white ambient light at full brightness. The ambient light is applied in addition to the default lighting, with the result that the scene appears over-bright, or washed out:
To solve this, you can reduce the intensity of the light by setting its color:
light {
    color 0.5 // 50% intensity
}
The color parameter of the light behaves just like any other color in ShapeScript. You can pass up to four values representing the red, green blue and alpha components.
light {
    color 1 0 1 // purple light
}

light {
    color #FF00FF // purple again, this time specified as a hex color literal
}
Alpha transparency isn’t really meaningful in the context of a light source, so you can think of the fourth (alpha) component of the color as its intensity. In the first example above we uses a color value of 0.5 to indicate 50% intensity, but an alternative way to specify this would be to use a color with 50% alpha:
light {
    color 1 0.5 // white light with 50% intensity
}

light {
    color #FF7F00 0.25 // orange light with 25% intensity
}
The advantage of this is that you can use the alpha component to vary the intensity of an arbitrary color, rather that having to calculate each component individually.
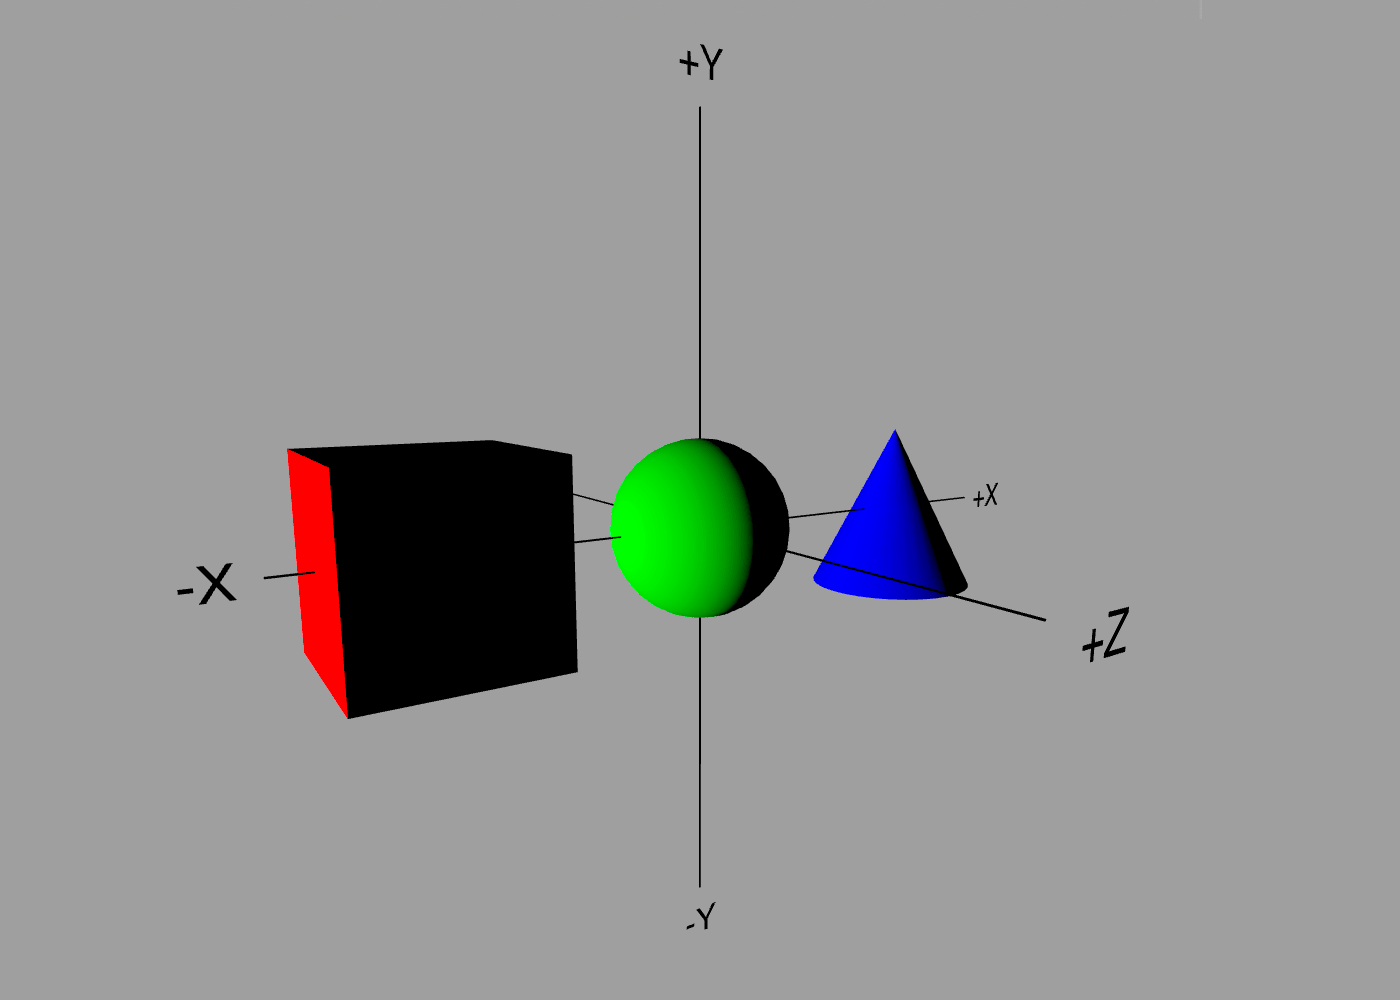
Directional
Directional lights simulate a distant light source, like the Sun. To create a directional light, add an orientation component to your light:
light {
    color white
    orientation 0 0 0
}
Note: unlike ambient light, adding a directional light to the scene disables/replaces the default lighting.
An orientation of 0 0 0 (or just 0 for short) creates a light that points directly down the Z axis, and is equivalent to the default light for a front-facing camera (unlike the default lighting, this light won’t move with the camera if you rotate the view however).
The three values represent the rotation around the Z, Y and X axes respectively. To create a light that shines from the left you could use:
light {
    orientation 0 0.5 0
}
This rotates the light by 90 degrees (0.5 * 180) around the vertical (Y) axis.
Lights are also affected by relative transforms, so the following would be equivalent to the above:
rotate 0 0.5 0
camera {
    orientation 0
}
Note: the orientation 0 is still required, otherwise the light will be treated as ambient and will not be affected by the rotation.
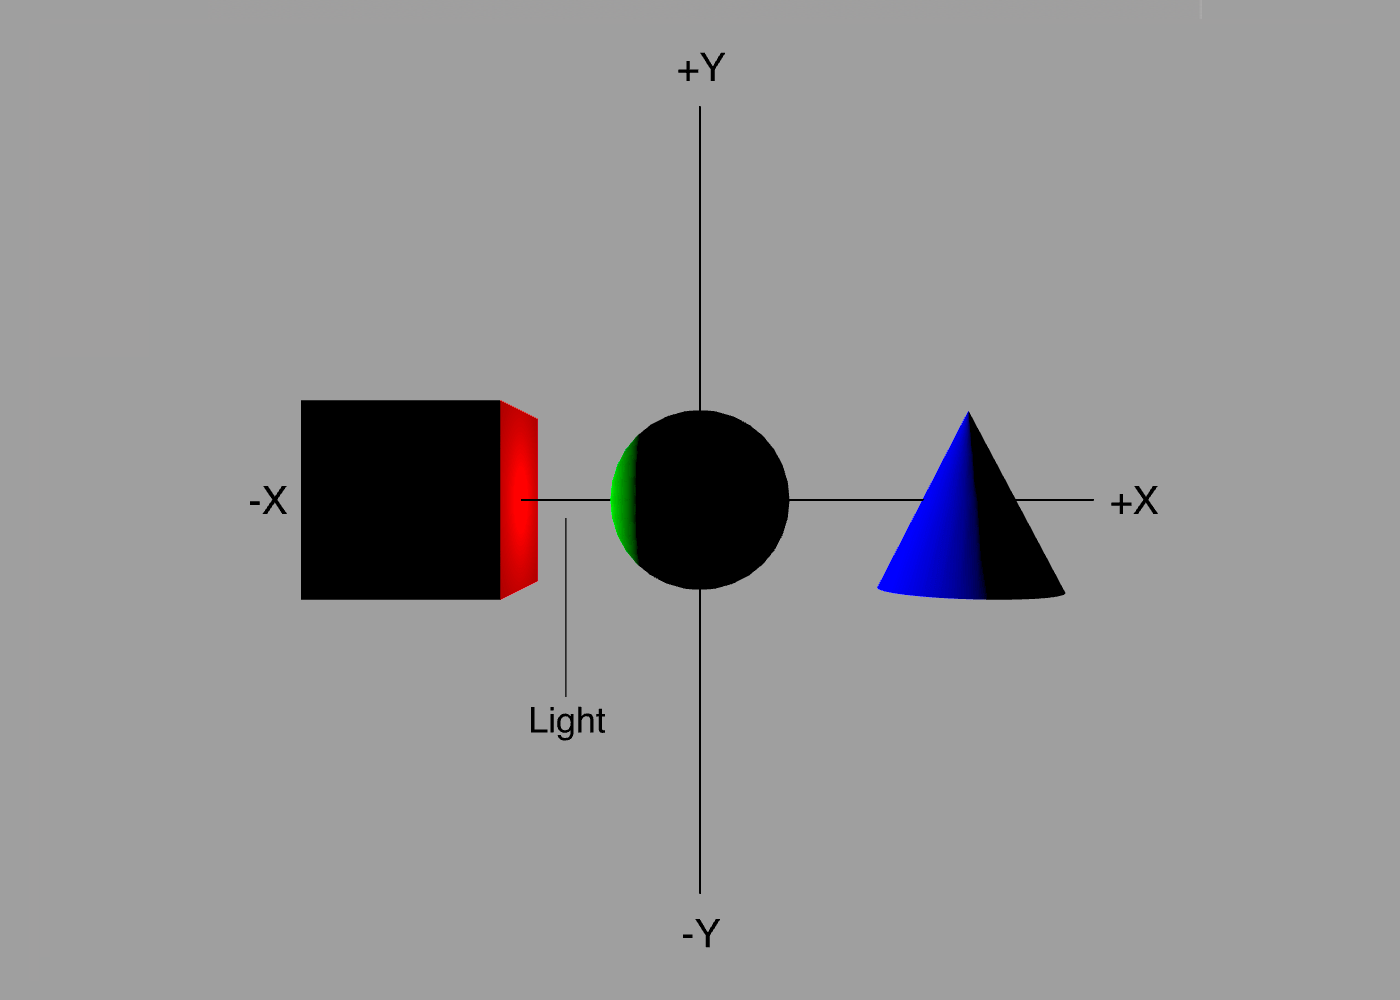
Point Lights
A point light is an omnidirectional light that exists at a particular location in space. It has a position, but no orientation:
camera {
    position -5 0 0
}
As you can see, the effect of placing a point light to the left of your scene is similar to a direction light facing from this direction. Unlike a directional light however, a point light can be placed in between objects in the scene:
camera {
    position 0.5 0 0
}
Spotlights
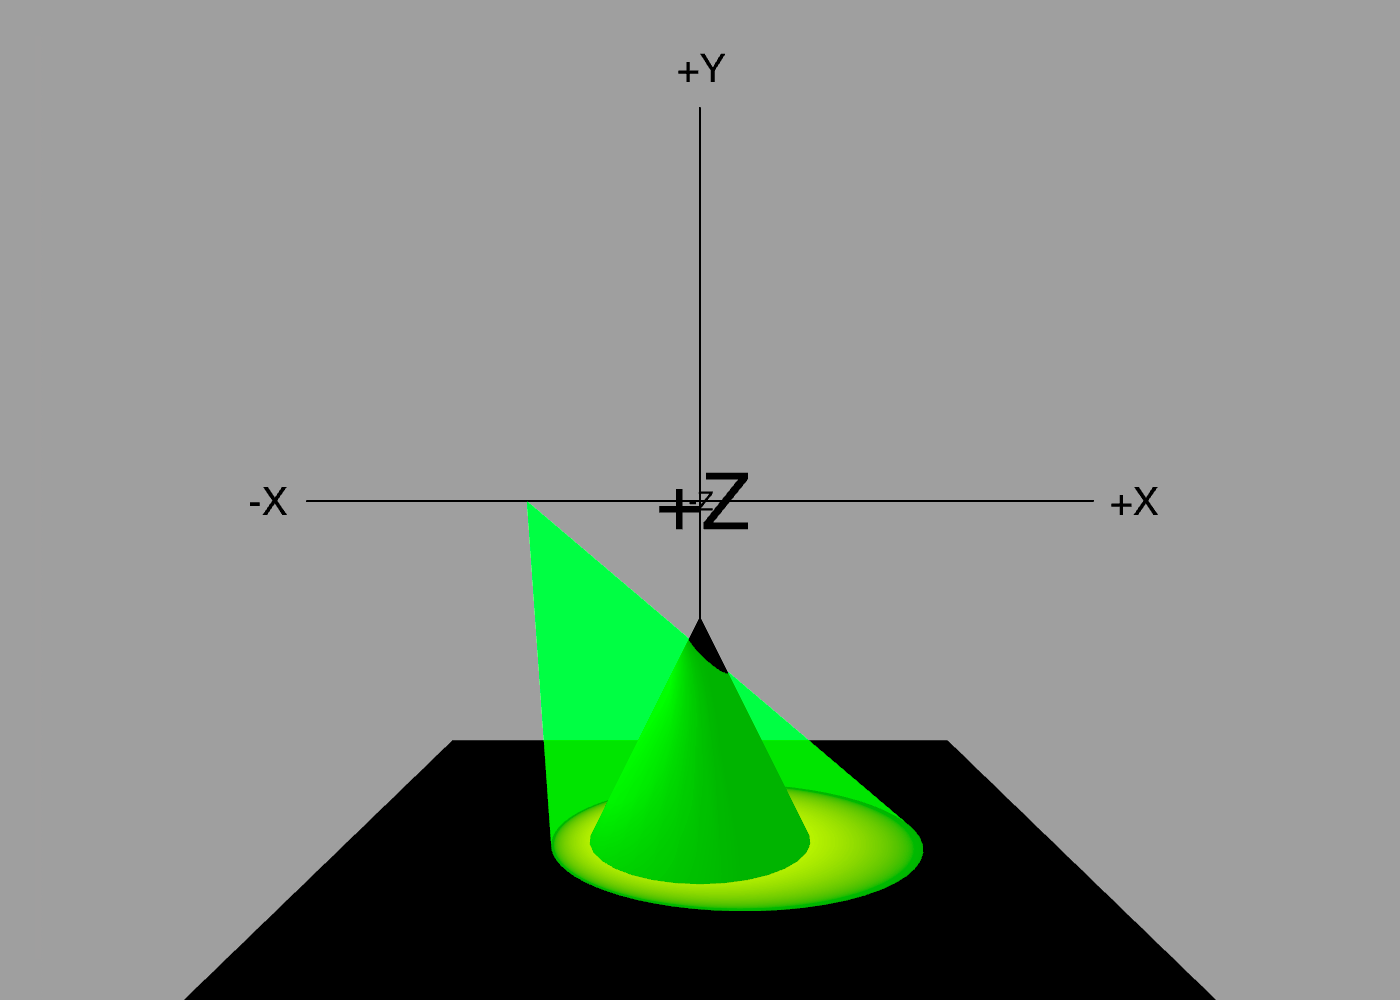
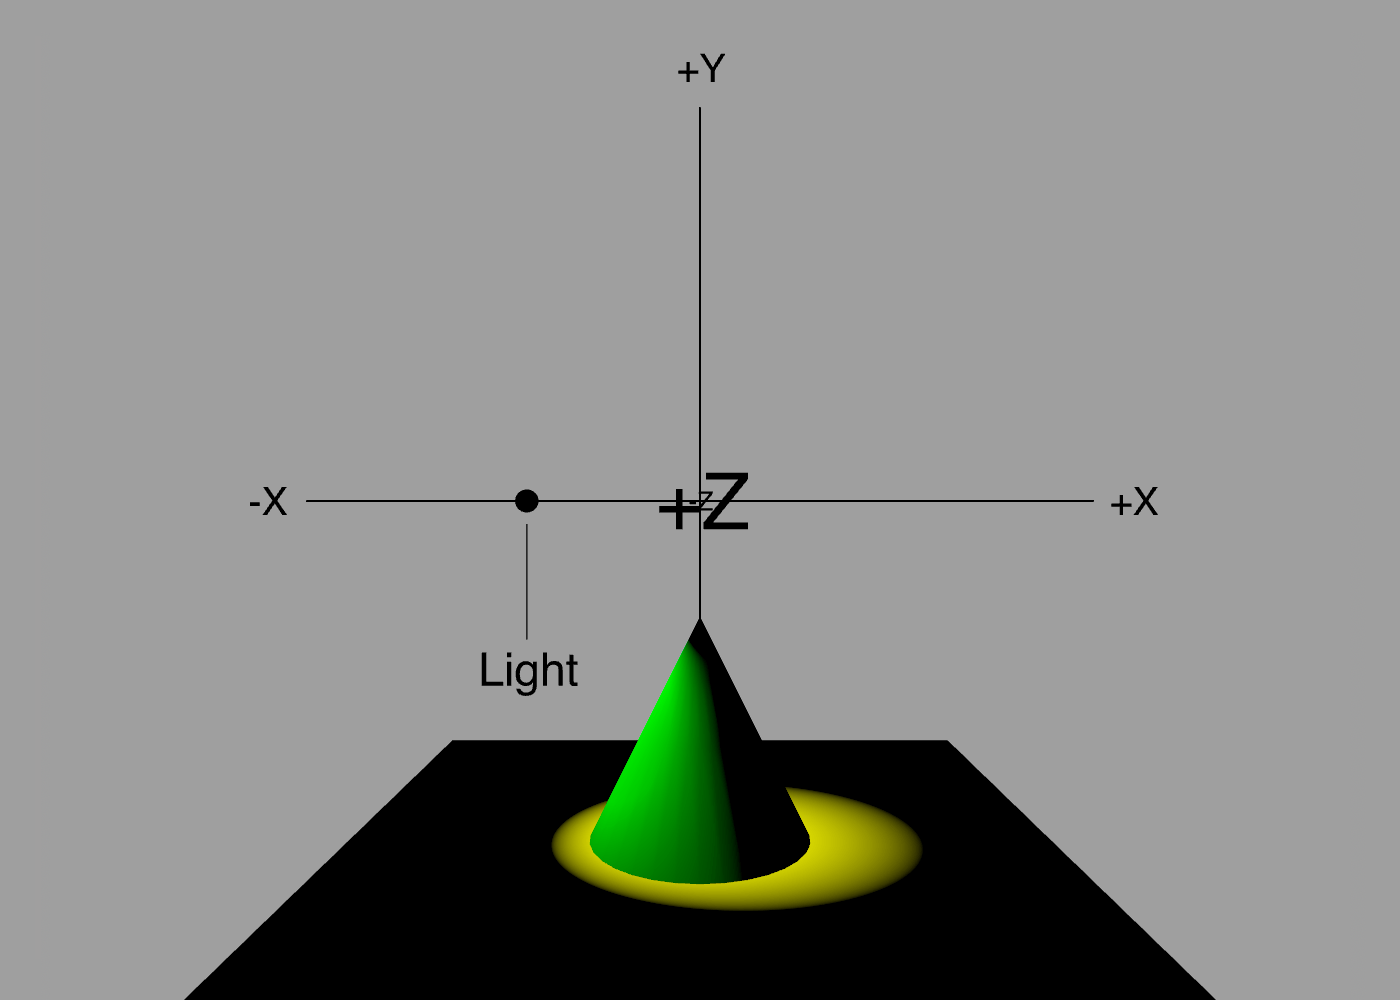
A spotlight has both a position and direction. The following code creates a yellow spotlight located just to the left of the enter of the scene, pointing down and to the right:
light {
    color yellow
    position -0.75 0 0
    orientation -0.15 0 0.5
}
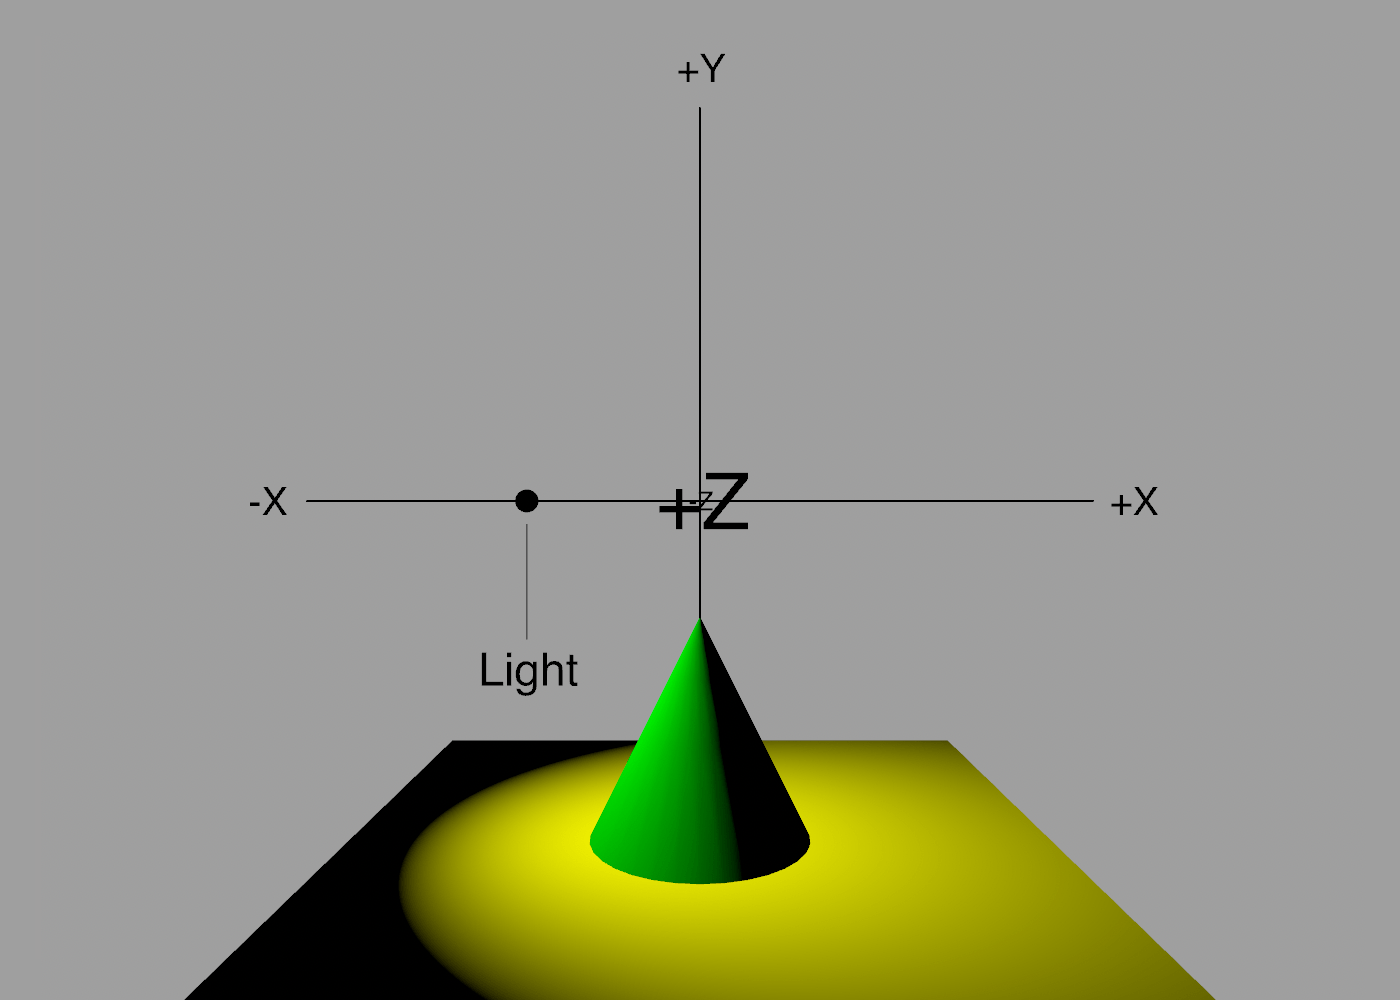
By default, spotlights cast light in a 45-degree cone. You can alter this with the spread option:
light {
    color yellow
    position -0.75 0 0
    orientation -0.15 0 0.5
    spread 0.5
}
The spread is a value between 0 and 1 representing a cone angle from 0 to 180 degrees, so 0.5 in the example maps to a 90-degree cone:
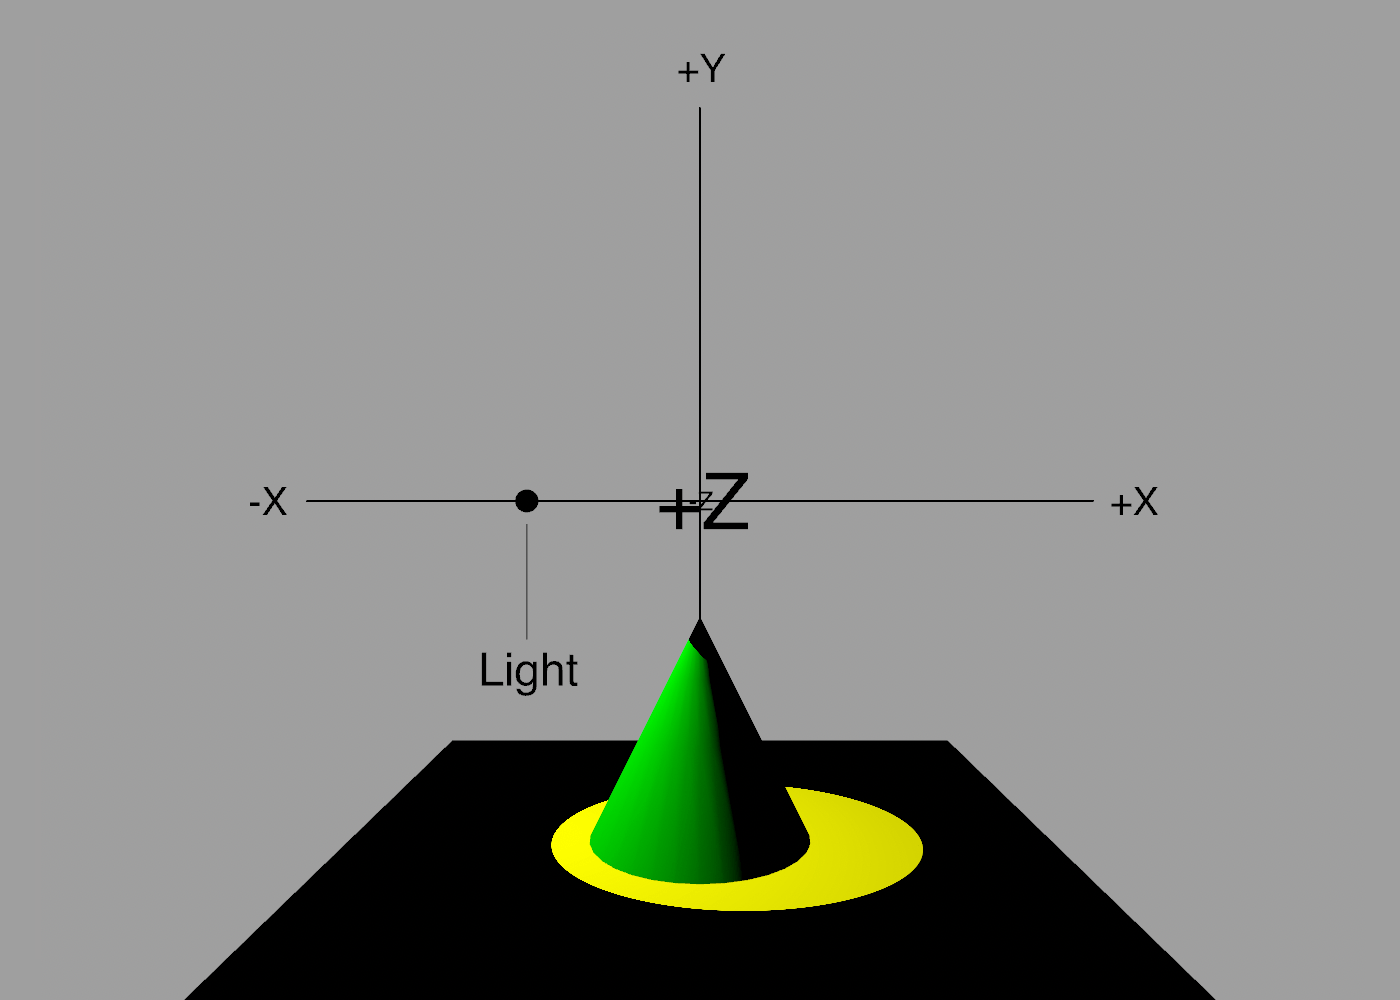
You’ve probably noticed that the edge of the light cast by the spotlight is blurred. The blurred region around the spotlight is known as the penumbra, and can be adjusted using the penumbra option:
light {
    color yellow
    position -0.75 0 0
    orientation -0.15 0 0.5
    penumbra 0
}
The penumbra is specified as a value between 0 and 1 representing the proportion of the total spotlight cone that should be blurred. The default is 1 (meaning the blur is spread right across the cone). A value of zero results in a completely sharp edge:
Shadows
Directional lights, point lights and spotlights can all cast shadows, but by default they do not. To enable shadows, use the shadow property. This property accepts a value between 0 and 1 that controls the shadow opacity:
light {
    orientation 0 0.5 0
    shadow 0.5 // 50% transparent shadows
}
Debugging
Since it can be hard to visualize the position of a spot or point light, you can use the debug command to make the light temporarily visible in the ShapeScript viewer:
debug light {
    color yellow
    position -0.75 0 0
    orientation -0.15 0 0.5
}